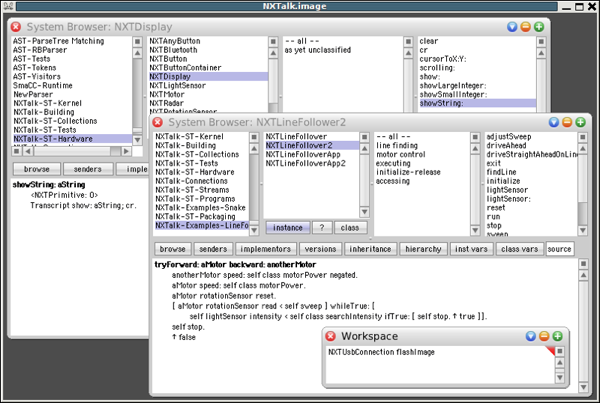
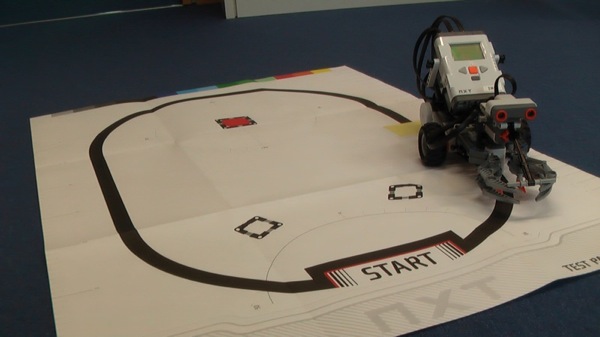
NXTalk is an integrated approach to making Smalltalk programming available on the Lego Mindstorms NXT (mindstorms.com) platform. It consists of two building blocks: the NXTalk virtual machine (VM) running on the NXT hardware, and the NXTalk programming environment, which is implemented in Squeak (squeak.org).
An NXTalk program entirely looks and feels like an ordinary Smalltalk program; the programming tools available in Squeak can be used seamlessly to develop software for the NXT. To some degree, NXTalk programs can also be simulated in Squeak.
NXTalk provides its own standard libraries, which are designed with special regards to the NXT's memory constraints. Thus, the class hierarchy is highly condensed while still offering the typical Smalltalk classes and methods. Additionally, special classes resembling the NXT's hardware devices like sensors, motors or buttons exist, providing easy and Smalltalk-like access to these entities. Although optimised for size, NXTalk has—besides libraries for collections, string manipulation or event handling—a full meta-layer. Not only is the cyclic meta-class structure accessible, but also each class’ method dictionary.
Like most Smalltalk implementations, NXTalk is image-based. In order to replace code or deploy applications, it uses Smalltalk’s meta-facilities. Thus, the virtual machine merely provides functionality for loading, starting and running an image, while the responsibilities for deployment and application management lie in the image itself and are written in Smalltalk. An NXTalk application or package consists of several compiled classes and additional meta-information such as the application’s name. The compilation process takes place on the Squeak side and the created packages along with its bytecode and data are transferred to NXTalk via remote method invocation. Nevertheless, the initial image has to be built up completely in Squeak and uploaded to the NXT in the first place.
The NXTalk virtual machine is a Smalltalk VM written in pure C and tightly coupled to the hardware of the Lego Mindstorms NXT robot. It uses NXOS (github.com), an open source operating system for the NXT, as its underlying base. Several specialised algorithms had to be developed in order to overcome the hardware limitations of the NXT. With 64 kB RAM and 256 kB Flash, the memory constraints were the main subject in virtual machine design. Thus, a very dense object layout was created, saving space for Smalltalk’s typical many small objects. At the same time, these size optimisations had to be taken with caution, as system performance has a great effect on user experience. The NXTalk virtual machine tries to balance these contradictory requirements in a reasonable fashion, while still providing a full Smalltalk environment and open access to the NXT's hardware devices like USB or Bluetooth.
We are working on extending support of NXTalk for both the target audience and with respect to supported hardware. Regarding the latter, more hardware drivers—for other than the default sensors shipped with the NXT—have to be implemented at the level of the virtual machine, and the according NXTalk classes have to be provided at the Smalltalk level.
Regarding target audience, we are working on providing an Etoys interface for NXTalk, making robot programming available at both the levels of scriptable objects and actual hardware. This extension will allow for putting programming experience gathered in, e.g., BotsInc to practice using real robots.
Download and installation instructions differ based on your particular interest in NXTalk. Typically, one either just wants to develop applications for NXT robots in Squeak, or one wants to do some VM hacking on top of that. Detailed instructions are given for each of these two interests below.
This section of the web page describes how the NXTalk VM and programming environment can be obtained and installed. The next section will document how the NXTalk standard image can be uploaded to the NXT.
System requirements differ based on what you want to do:
Since Squeak currently has no support for USB, application deployment (i.e., uploading NXTalk applications to the NXT) is only safely supported on Linux at this time.
In Squeak, you need to install the NewParser 5 package from Universes.
In your Squeak image, install the NXTalk Squeak code from SqueakSource (SqueakSource page).
Download the VM binary image (nxtalkvm.bin). This binary file can be installed onto the NXT brick using the Lego software it is delivered with. Follow the instructions in the Lego manual to install the NXTalk VM on the NXT.
In your Squeak image, install the NXTalk Squeak code from SqueakSource (SqueakSource page).
Download the VM source code (tar.bz2) and unpack it into a directory of your choice. Follow the instructions in the README file to build the VM. Required external components (e.g., NXOS or the ARM compiler) will be downloaded and installed automatically.
Once the VM binary has been generated, it needs to be flashed onto the NXT. If you have a Windows or Mac system with the Lego standard software available, you can flash the NXT using this; otherwise, please follow the instructions below.
First of all, you need to prepare your system to support flashing the NXT (it is assumed you have a shell window opened and your current working directory is the nxtalk as contained in the tarball):
The following steps are required each time you want to flash a new VM onto the NXT.
First, connect the NXT to a mapped USB port as follows:
Note: These steps are required whenever you want to use the USB connection to your NXT, e.g., to deploy an application from within Squeak.
Next, flash the VM onto the NXT.
First, turn on your NXT and connect it to your PC via USB as described above. The NXT should display something like this:
Ok: Boot
Right: New image
Cancel: Exit
Press the right arrow button on the NXT to put the NXTalk VM into image-loading mode.
In your Squeak image, open a Workspace and do NXTUsbConnection flashImage.
The NXT should now start displaying characters and eventually display a menu, from which you can select applications to run using the arrow buttons. Start an application by pressing the orange button.
The NXTalk VM and development environment are licensed under the MIT License. NXOS, which is the operating system in which NXTalk is running on the NXT, is licensed under the GPL but not part of our contribution.
© 2006-2023 HPI Software Architecture Group